Nadim Z. Baba, DMD, MSD
Repair of implant-retained overdentures can be time-consuming and costly, even in the hands of experienced clinicians. Patients frequently present requesting that their prosthesis be transformed from a removable prosthesis to a fixed one. This article will present a technique for the fabrication of an implant-supported fixed prosthesis that can be accomplished with minimal expense to both the patient and clinician.
A 65-year-old male patient presented for a specialist consultation regarding his existing maxillary and mandibular implant-retained overdentures, complaining that his mandibular overdenture broke and “I cannot eat.” The overdentures had been placed 11 years ago; both were retained with LOCATOR (Zest Dental Solutions, zestdent.com) from both arches. The patient's health questionnaire and medical history revealed no significant findings. He presented with no medical contraindications to prosthodontic treatment.
His main concern was to determine if it was possible for him to get a fixed prosthesis. Until the mandibular overdenture broke, the patient was very satisfied with the LOCATOR abutments. His vertical dimension of occlusion (VDO) and interarch space were evaluated and found to be acceptable. After the presentation of different treatment options, the patient consented to a treatment modality that consisted of an implant-supported, fixed full-arch prosthesis using the existing implants present in his jaws.
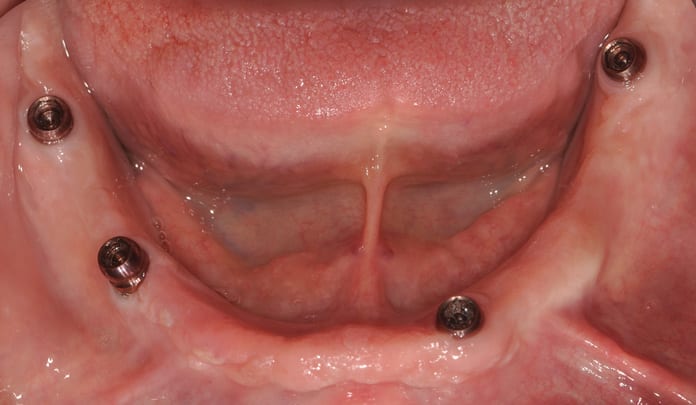
After removal of the LOCATOR abutments, the tissue height for each implant was measured with a periodontal probe, and LOCATOR F-Tx® abutments (Zest Dental Solutions) with the appropriate cuff height were then ordered. The selected abutments were screwed in place using the abutment driver, and a calibrated torque wrench was used to torque each abutment according to the implant manufacturer's recommended torque value (Figure 1 through Figure 3). White block-out spacers were placed around the LOCATOR F-Tx abutments, and impression copings were seated on each abutment and aligned to be as parallel to each other as possible (Figure 4 and Figure 5). Due to the spherical coronal geometry of the abutments, it is possible to snap the impression copings in place and correct angulation up to 20 degrees from a common vertical.
Duplicates of the patient's maxillary and mandibular dentures were poured in cold-cure clear acrylic and adjusted, and a border molding impression and then a definitive impression were made using fast-set polyvinylsiloxane impression material. Care must be taken to ensure that the impression trays do not hit the impression copings causing them to tilt and lose their alignment. Because the impression trays were duplicate copies of the existing dentures and because the patient was satisfied with the current esthetics and phonetics, and considering that the VDO and interarch space were adequate, the trays were used to record centric relation with the use of a registration material. Subsequent to the final impression, the LOCATOR F-Tx abutment analogues were snapped onto each impression coping (Figure 6) and stone was poured to prepare a definitive cast.
The definitive maxillary and mandibular casts along with duplicates of the patient's existing dentures were sent to a dental device manufacturer (Cagenix, cagenix.
com) for the design and milling of the metal frameworks for the final prostheses. After approval of the CAD designs, the milled frameworks were sent back to the laboratory for denture teeth set-up (Figure 7 through Figure 9).
Wax trial dentures were appraised to assess lip support, esthetics, and phonetics. Once patient consent was obtained, the trial dentures were sent to the laboratory for conventional processing. At the placement appointment, the block-out spacers were inserted on the LOCATOR F-Tx abutments and the denture attachment housings with new black processing balls were seated in place (Figure 10). Prior to seating the denture attachment housings, the black processing balls should be screwed in place with light finger pressure to avoid stripping and cross-threading. The milled recess in the intaglio surface of the metal framework of the definitive prosthesis will aid in the alignment of the prosthesis in the appropriate path of insertion onto the denture attachment housings. After patient consent of the esthetics and phonetics, the housings were dried, CHAIRSIDE® Attachment Processing Material (Zest Dental Solutions) was injected around the housings, and the prosthesis was seated in place.
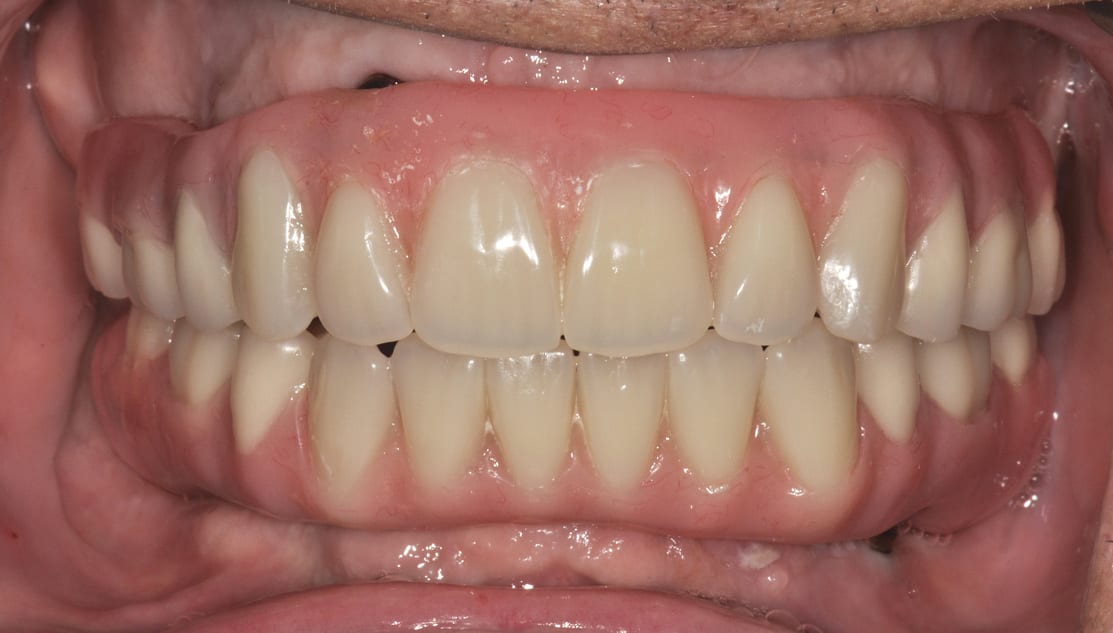
Once the attachment processing material set, the prostheses were removed, the black processing balls were replaced with the appropriate PEEK retention balls, and the prostheses were delivered (Figure 11 and Figure 12).
ABOUT THE AUTHOR
Nadim Z. Baba, DMD, MSD
Professor, Advanced Education Program in
Prosthodontics, Loma Linda University,
Loma Linda, California


