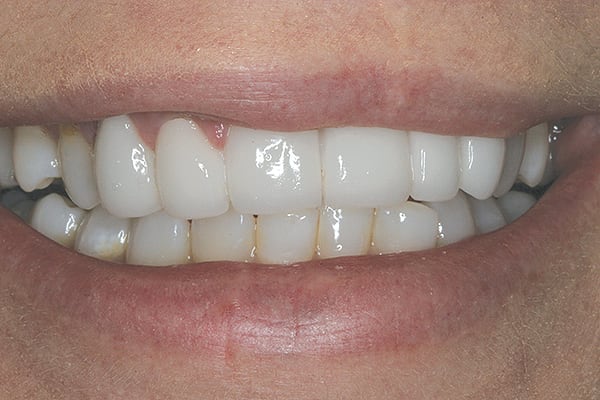
Clinical conditions can be challenging in the treatment-planning phase in cases involving a cleft palate. The adjacent supporting periodontal structures often present defects that compromise the esthetic result. In this case, which features a range of restorative products from Parkell, Inc. (www.parkell.com), the finished restoration provided a natural length to the patient’s teeth and enabled a relaxed smile.
Key Takeaway Points:
• Patient with previous cleft palate surgical correction presented with a maxillary anterior bridge and was unhappy with the esthetics.
• Treatment goal of final fixed prosthesis was to correct midline cant, close apical opening under pontics, and shorten several tooth lengths using a custom gingival shade of porcelain.
• Finished restoration featured a gingival mask that blended closely with the existing tissue, providing a natural length to the teeth and enabling a relaxed smile.
Figure Captions
1. A 45-year-old female patient who had a history of cleft palate surgical correction presented with a six-unit maxillary anterior bridge that had become discolored and had exposed metal margins. The length of the teeth did not match on both sides when the patient smiled. Her smile line had a “half-moon” shape, and the midline cant was slanted to the left side.
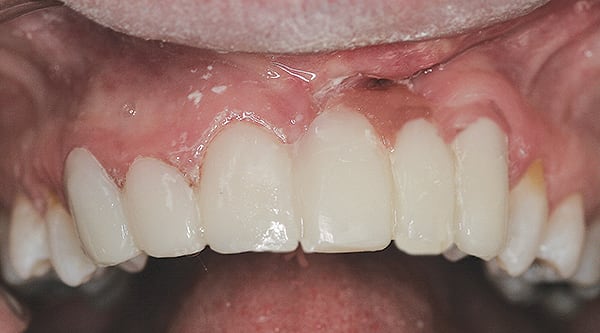
2. The reverse smile line was more apparent when the teeth were apart. At this angle, the remaining cleft in the gingival tissue (apical to the pontics of the left incisors) was apparent. This space was a chronic food trap.
3. Models showing the “before” and “after” mock-up. The treatment goal of the final fixed prosthesis was to correct the midline cant, close the apical opening under the pontics, and shorten the lengths of the left central incisor, lateral incisor, and canine using a custom gingival shade of porcelain. A vacuum stent was made from the mock-up model to aid in the fabrication of the provisional restoration.
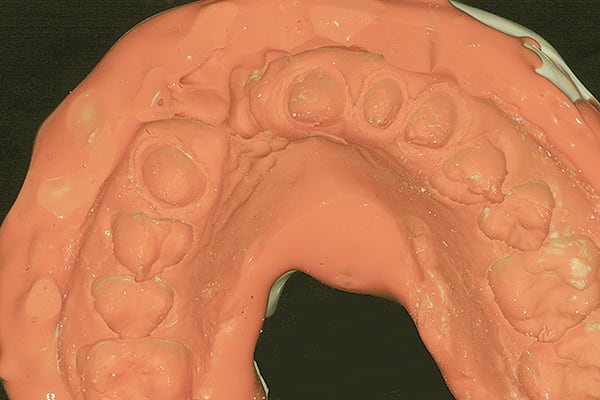
4. An impression was made using a full-arch, mandibular perforated metal tray with Sharp™ Heavy-Body and Wash Premium VPS (Parkell, Inc.) using a two-step technique. A mandibular tray was used to provide a greater adaptation of the tray to the lingual side of the soft tissue. The impression needed to capture the buccal flange above the gingival cleft.
5. The provisional restoration was fabricated using SmarTemp® dual-cure, temporary, crown and bridge material (Parkell, Inc.), which was injected into the stent and placed in the mouth. An Aurora™ S3 curing light (Parkell, Inc.) was passed over the labial and lingual surfaces for 5 seconds to obtain an initial cure. The stent was removed and then replaced continuously as the polymerization proceeded. This method prevented potential undercuts.
6. To create a realistic transition between the gingival-color portion of the provisional and the natural gingival tissue, a direct composite technique was used. Combinations of various pink composite materials were mixed together until a proper shade was established. The shape and form of the gingiva, including the papilla, was contoured to restore the natural architecture. After the patient’s approval, an alginate impression model was made of the provisional and sent to the laboratory, along with a customized gingival composite shade tab, to aid in designing the final restoration.
7. Using 3Shape™ software (www.3shape.com), a scan of the provisional model was superimposed onto the digital proposal to duplicate incisal position and length. The software program was able to blend the two models together.
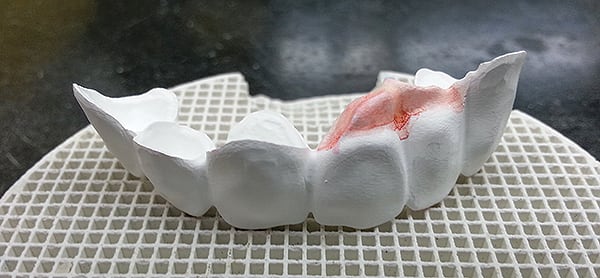
8. The six-unit prosthesis is shown on the firing tray prior to sintering. Pink stain was applied where the artificial gingiva would be displayed.
9. The prosthesis was placed on the soft-tissue working model. At this point, the incisal one-third was cut-back to allow for layering of incisal porcelain. Using the customized gingival composite shade tab, the laboratory was able to create the correct gingival shade porcelain.
10. The completed final restoration with the artificial gingival display. During try-in, single-sided AccuFilm® I (Parkell, Inc.) was used to determine the intensity of the contact from the adjacent teeth. AccuFilm® I can also be used if any areas on the prepared teeth prevent the full seating of a restoration. An inked spot would show exactly the area to be adjusted. After the patient approved the try-in, the intaglio surfaces were cleaned. Brush&Bond® adhesive (Parkell, Inc.) was applied to the abutment teeth, air-thinned, and light-polymerized. SEcure® adhesive resin cement (Parkell, Inc.) was used to cement the restoration.
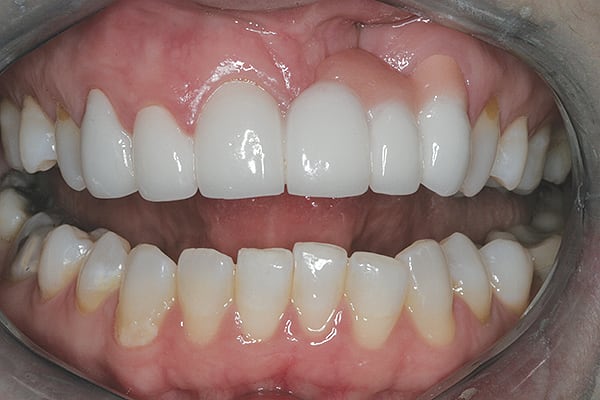
11. A retracted view of the finished restoration. The gingival mask blended closely with the existing tissue, providing a natural length to the teeth. The customized pink composite shade tab sent to the laboratory, along with the other critical components to this case (impressions, opposing model, model of the provisional restorations, bite registration, face-bow, and photographs) were extremely helpful to the laboratory.
12. The patient showed a relaxed smile with the final restoration.
The author wishes to thank Warren Murrill and his team at Oral Arts Dental Laboratory (www.oralartsdental.com) for their outstanding attention to detail and communication skills.
About the Author
Gregg A. Helvey, DDS, MAGD
Adjunct Associate Professor, Virginia Commonwealth University School of Dentistry, Richmond, Virginia
Private Practice, Middleburg, Virginia


