Predictable Nanohybrid Composite Systems and Techniques for Anterior and Posterior Direct Restorations
Abstract
Advancements in the chemical composition of direct restorative materials have facilitated greater ease of use, better handling, and enhanced functional predictability. Nanohybrid composites are among these innovations, providing enhanced physical and optical properties that contribute to easier and long-lasting polishability, enhanced shade matching and light reflection/deflection properties, and reduced shrinkage. Becoming familiar with a particular composite system and following a repeatable protocol for routine restorations are key to achieving predictable and long-lasting restorative results. This article reviews the advantageous characteristics of nanohybrid composites and demonstrates the use of two complementary composite systems for anterior and posterior restorations.
A dentist’s ability to precisely place esthetic and functional direct composite restorations has been enhanced in recent years. Widespread acceptance for the need to master adhesive bonding techniques and strictly adhere to a manufacturer’s recommended protocol (eg, material thickness, curing-light times, intensities) has increased the success of direct restorations. In addition, advancements in the chemical composition of direct restorative materials have facilitated greater ease of use, better handling, and enhanced functional predictability.1-3
Among the evolutionary additions to direct composite materials is nanotechnology. In particular, nanotechnology imparts superior physical and optical properties compared with previous generations of direct composite materials. Composite characteristics resulting from nanotechnology include easier and long-lasting polishability for better luster and plaque resistance, enhanced shade matching and light reflection/deflection properties for natural esthetics, and reduced shrinkage for greater marginal integrity and less likelihood of microleakage and postoperative sensitivity.4
These are important considerations, particularly because composites experience some degree of shrinkage during polymerization. This occurs as the monomers within the composite cross-link to become polymers, resulting in volumetric shrinkage as the space between the monomers reduces, limiting the monomer’s ability to move freely and subsequently inducing stress.5
Shrinkage stress can destroy the bond between the composite material and the tooth itself (ie, marginal gap formation). Because Class I and II restorations have the greatest number of bonded surfaces, they are therefore the most susceptible to the effects of shrinkage stress.6 However, shrinkage stress can also affect anterior restorations. When a bulk of composite material is placed on the facial surface of a tooth and cured, the material can pull away from the tooth structure if the bond is not strong enough.7
For posterior restorations, a protocol is advocated in which composites are placed incrementally, rather than simultaneously along opposing preparation walls, in order to reduce the shrinkage stress and forces placed on the material and tooth structure. Becoming familiar with a particular composite system and following repeatable protocol for routine restorations, in the author’s opinion, are key to achieving predictable and long-lasting restorative results. In the posterior, nanohybrid composites have the chemistry and material properties necessary to withstand mastication forces, including low shrinkage, overall strength, and surface polish retention.8-10
For multilayered anterior restorations, using a system with complementary shades of enamel, dentin, and incisal composites is similarly advantageous. When basic principles of occlusion are followed with proper anterior guidance, nanohybrid composite systems enable the esthetic restoration of fractured anterior teeth in a conservative and economic manner.11-13
Various nanohybrid composites are available today (eg, Venus Diamond®, Heraeus Kulzer, www.heraeusdentalusa.com; Venus Pearl, Heraeus Kulzer; FiltekTM Supreme, 3M ESPE, www.3mespe.com; Tetric EvoCeram®, Ivoclar Vivadent, www.ivoclarvivadent.com). For posterior restorations, among them is a universal nanohybrid composite (Venus Diamond) that demonstrates enhanced wear resistance to masticatory forces, high flexural strength, and low shrinkage stress.14,15 Formulated with a urethane monomer chemistry, this nanohybrid composite demonstrates handling and sculptability properties suitable for posterior restorations, such as firmness and adaptability. These characteristics facilitate easier and more efficient shaping and contouring of composite increments along preparation walls, and the nanohybrid particles contribute to long-lasting luster.16
For anterior restorations, a softer, brushable version of the universal nanohybrid material is available for layering techniques (Venus Pearl). Combining different particle sizes to achieve optimal filler density for high wear resistance, the product demonstrates a nonsticky consistency for convenient handling, ideal color adaptation, sculptability, and polishability. In addition, the nanohybrid composition contributes to low shrinkage stress and high durability for long-lasting esthetic restorations.
Case Presentation 1: Posterior
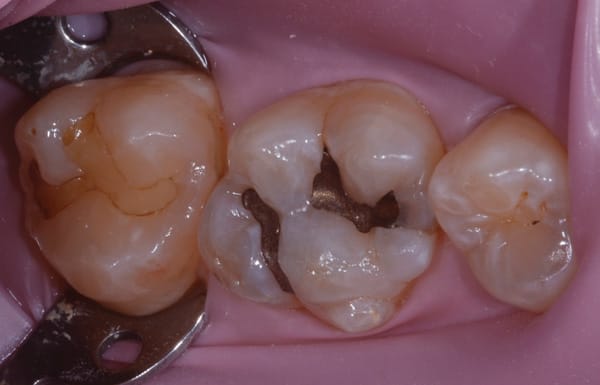
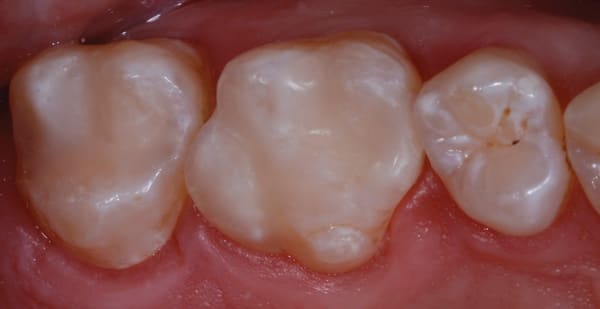
A male in his late 20s presented with failing composite and amalgam restorations in teeth Nos. 2 and 3, which required replacement (Figure 1). A thorough examination was performed, and it was determined that the teeth could be restored directly with a nanocomposite (Venus Diamond, Heraeus Kulzer).
When restoring posterior teeth, streamlining materials and having predictable and simple protocols benefit both the dentist and patient. Being productive chairside respects a patient’s time and financial situation while simultaneously enabling the dentist to complete procedures quickly and efficiently.
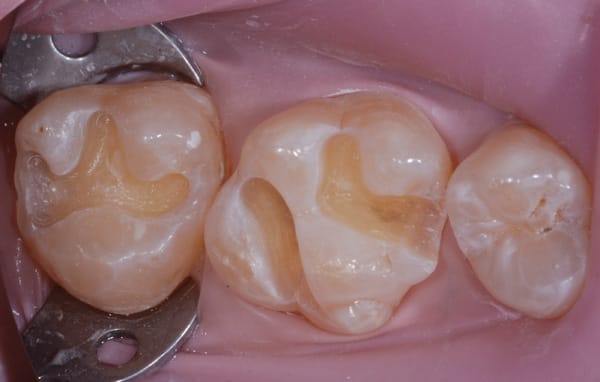
A rubber dam was placed (Figure 2), after which the defective restorations were removed and the preparations refined and cleaned (Figure 3). The preparations were etched with a total-etch technique (ie, first enamel, then dentin), rinsed, and dried. A desensitizing agent (Gluma®, Heraeus Kulzer) was applied with a dry microtip to the dentin for rewetting.
A fifth-generation, single-bottle, two-step adhesive (ie, primer and adhesive in one) was applied to the preparations with agitation for 20 seconds, lightly air dried, and light cured. Then, a thin 0.5-mm layer of flowable nanocomposite (Venus Diamond Flow [Heraeus Kulzer] in this case; other options include Tetric EvoFlow, Ivoclar Vivadent; and Filtek Flow, 3M ESPE) was placed on the floor of the preparations to cover the dentin and create an intimate adaptation to the tooth structure to fill in any micro-voids (Figure 4).
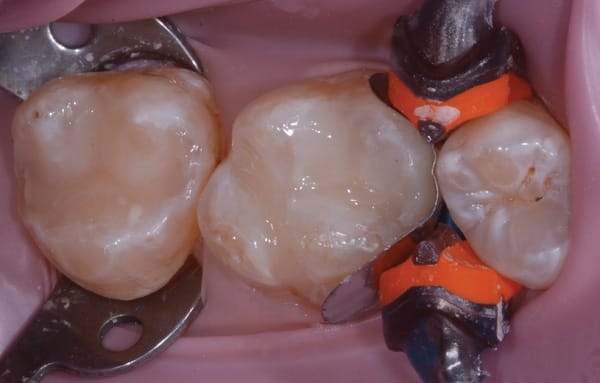
The posterior restorations were then incrementally built up by placing the selected composite first on buccal walls of the preparations and then the lingual walls. Next, an LED curing light at 10 seconds per curing session was used.
This technique helps reduce stress on the cusps and cavosurface margins, or “C factor,” as a result of polymerization shrinkage. Filling and curing composite bonded to opposing cusps simultaneously as opposed to incremental layering could result in potential marginal gap formation, white lines at the restorative margin, and future microleakage.
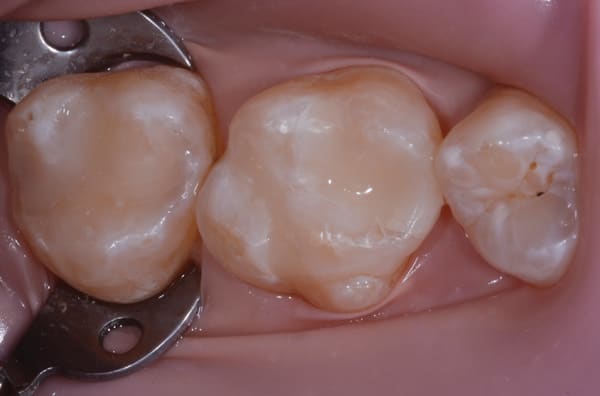
After complete build-up (Figure 5), the restorations were finished and polished, beginning with a football-shaped fine diamond bur for initial contouring (Figure 6). A polishing system (Venus Supra Polishers, Heraeus Kulzer) was selected that incorporates multi-grit and tip polishers to produce a natural luster (Figure 7). Other systems also are available (eg, Shofu rubber tips, www.shofu.com).
Case Presentation 2: Anterior
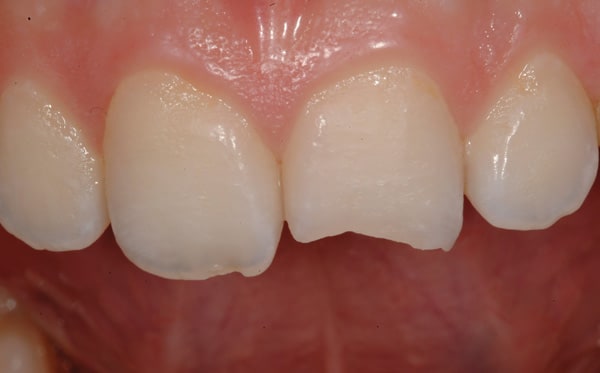
An adolescent presented after fracturing tooth No. 9 and chipping tooth No. 8 during a fall (Figure 8). The patient’s parents desired conservative, natural-looking esthetic treatment that would function long term. Following a thorough examination, a multilayered direct composite restoration was recommended.
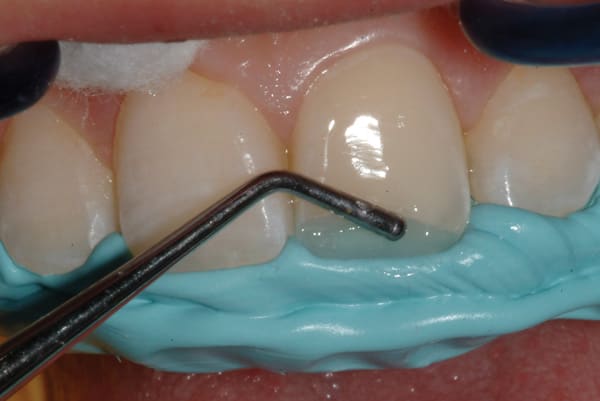
An intraoral mock-up was created with flowable composite (Venus Diamond Flow, Heraeus Kulzer) to help visualize the final result (Figure 9 and Figure 10). Following approval from the patient and parents, an incisal edge index was created using a light-body bite registration material (Blu-Mousse®, Parkell, www.parkell.com) to guide composite placement and thickness.
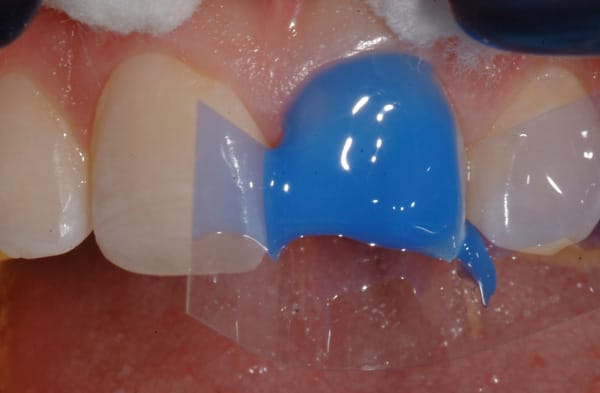
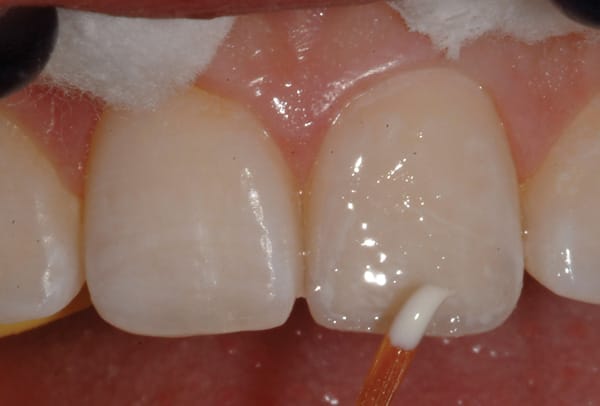
A very minimal surface preparation was made consisting of a long, “infinite bevel,” without sharp angles. The preparation was etched using a total-etch technique (Figure 11), then rinsed and dried. A fifth-generation one-bottle bonding agent was applied, and the preparation was cured as described in Case 1, after which the incisal index was placed in the mouth to build the restoration framework (Figure 12).
The restoration framework was created by placing a semi-translucent, milky A1-shaded enamel composite (Venus Pearl) into the incisal index (Figure 13). This framework layer was cured and the matrix removed. With the lingual layer framework in place, a medium opaque (MO) composite was placed—similar to the manner in which a ceramist layers a porcelain crown to mask underlying defects—to block the fractured edge and serve as the dentin substitute layer (Figure 14) and then cured.
Because the patient’s natural dentition exhibited a white hypocalcification typical of younger patients, white tint (Color Correct, Kerr Corporation, www.kerrdental.com) was applied on top of the dentin composite layer to simulate the appearance of the adjacent tooth structure (Figure 15). Then, the final clear translucent CL-shaded incisal composite (Venus Pearl) layer was applied (Figure 16), sculpted into place, and then cured.
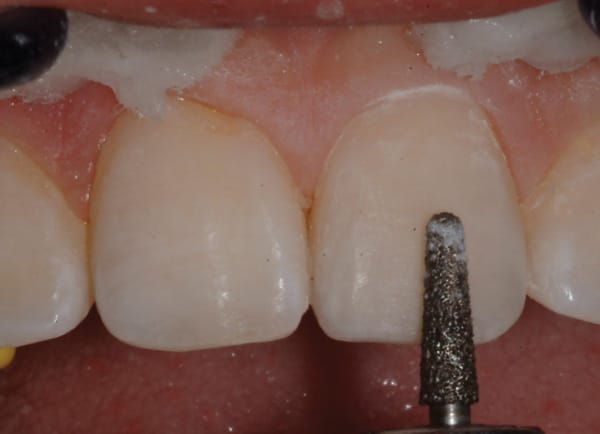
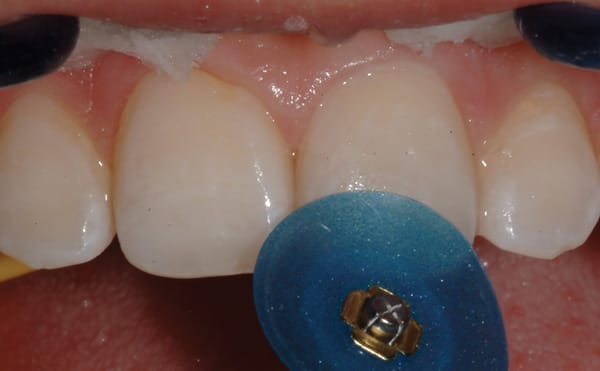
Three distinct steps were undertaken to finish the restoration. Red-striped, flame, and football diamonds were used for contouring the restoration (Figure 17). Subsequently, medium sandpaper and flexible discs were used for finishing the restoration surface (Figure 18). A nail file (ie, 180-grit file) was employed to ensure that the incisal edges of teeth Nos. 8 and 9 were perfectly even; by sliding the file forward and backward across both central incisors simultaneously, both edges were precisely aligned.
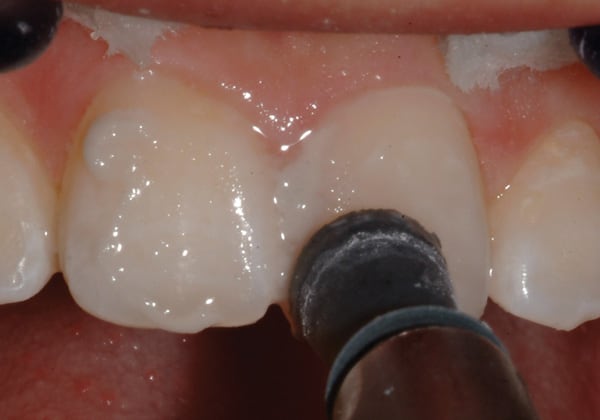
Lastly, polishing was accomplished using flour of pumice and a soft rubber cup, followed by the use of a composite polishing medium grit rubber cup and then an application of a polishing paste (Enamelize™, Cosmedent, www.cosmedent.com)
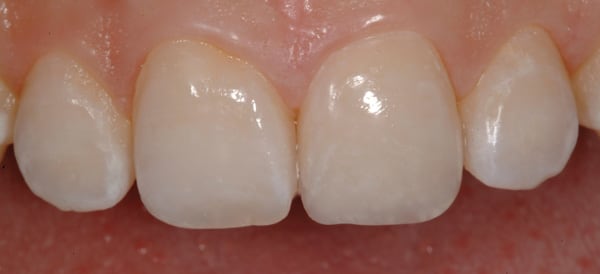
with a purple felt wheel (Figure 19). Following this specific sequence of steps resulted in an anterior restoration that blended seamlessly with the patient’s natural dentition (Figure 20) and demonstrated the lifelike texture, polish, and contours that pleased both the patient and his parents.
Conclusion
The cases presented in this article are fairly straightforward, routine restorative cases. However, they demonstrate the importance of using time-honored techniques and comprehensively developed composite systems to facilitate ease of placement to achieve functional, lifelike esthetics when properly selected for the indication. Knowledge of available direct composite systems and their material and handling properties—combined with a developed skill set for precisely and repeatably placing direct composite restorations—makes dentists better practitioners.
About the Author
John F. Weston, DDS
Private Practice,
La Jolla, California
Disclosure
Dr. Weston has received honoraria from Heraeus Kulzer for teaching.
References
1. Demarco FF, Corrêa MB, Cenci MS, et al. Longevity of posterior composite restorations: not only a matter of materials. Dent Mater. 2012;28(1):87-101.
2. Vaderhobli RM. Advances in dental materials. Dent Clin North Am. 2011;55(3):619-625.
3. Malhotra N, Mala K, Acharya S. Resin-based composite as a direct esthetic restorative material. Compend Contin Educ Dent. 2011;32(5):14-23.
4. Chen MH. Update on dental nanocomposites. J Dent Res. 2010;89(6):549-560.
5. El-Sahn NA, El-Kassas DW, El-Damanhoury HM, et al. Effect of C-factor on microtensile bond strengths of low-shrinkage composites. Oper Dent. 2011;36(3):281-292.
6. Giachetti L, Scaminaci-Russo D, Bambi C, Grandini R. A review of polymerization shrinkage stress: current techniques for posterior direct resin restorations. J Contemp Dental Pract. 2006;7(4):79-88.
7. Van Ende A, De Munck J, Mine A, et al. Does a low-shrinking composite induce less stress at the adhesive interface? Dent Mater. 2010;26(3):215-222.
8. Lindberg A, van Dijken JW, Hörstedt P. In vivo interfacial adaptation of class II resin composite restorations with and without a flowable resin composite liner. Clin Oral Investig. 2005;9(2):77-83.
9. Rodrugues Junior SA, Pin LF, Machado G, et al. Influence of different restorative techniques on marginal seal of class II composite restorations. J Appl Oral Sci. 2010;18(1):37-43.
10. Wieczkowski G Jr, Joynt RB, Klockowski R, Davis EL. Effects of incremental versus bulk fill technique on resistance to cuspal fracture of teeth restored with posterior composites. J Prosthet Dent. 1988;60(3):283-287.
11. Fahl N Jr. A polychromatic composite layering approach for solving a complex Class IV/direct veneer-diastema combination: part I. Pract Proced Aesthet Dent. 2006;18(10):641-645.
12. Fahl N Jr. A polychromatic composite layering approach for solving a complex Class IV/direct veneer/diastema combination: part II. Pract Proced Aesthet Dent. 2007;19(1):17-22.
13. Pontons-Melo JC, Pizzatto E, Furuse AY, Mondelli J. A conservative approach for restoring anterior guidance: a case report. J Esthet Restor Dent. 2012;24(3):171-182.
14. Koottathape N, Takahashi H, Iwasaki N. Two- and three-body wear of composite resins. Dent Mater. 2012;28(12):1261-1270.
15. Marchesi G, Breschi L, Antoniolli F, et al. Contraction stress of low-shrinkage composite materials assessed with different testing systems. Dent Mater. 2010;26(10):947-953.
16. Venus Diamond [package insert]. South Bend, IN: Heraeus Kulzer; 2010.

